Sending the mail invite to the guests is made easy with the use of predefined templates.
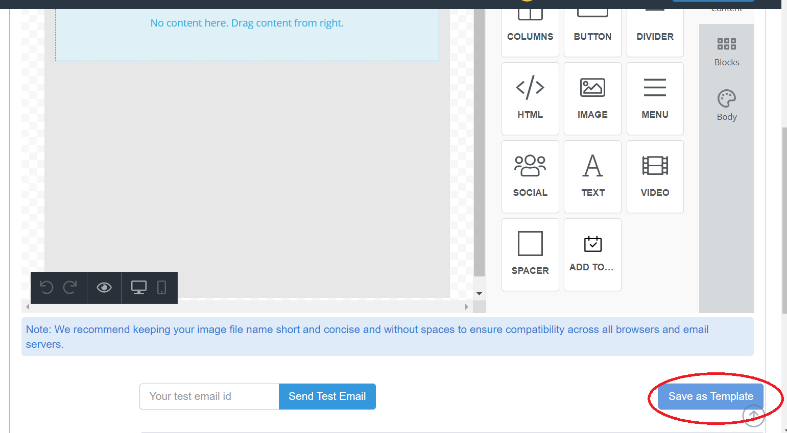
- The customized template consists of workspace on the left and tool-box on the right.
- The tools at the right can be dragged and dropped on the workspace.

- Here you will find customized templates.
- To add a sample template, click on “Select Reminder Template”.
- This will give a pop-up consisting of various samples.
- Select one by clicking on it.
- The selected sample will appear on the workspace.

- To add the event registration link in your email invitation, click on the RSVP button and add [RSVP_LINK] under the URL section.

- This is useful as that will give a link to your main event.
- You can also preview your template by clicking on the “eye” icon at the left bottom of the workspace.

- This will give a new page where you can select “Desktop” or “Mobile” for a preview of the template.

- After you complete the template click on “Save as Template” at the bottom right corner.
- Then click on the “Send Now” button.
- If you want to send it later then click on “Select date” and add the date when you want to send.
- Then click on “Save as draft” button to save all changes in a draft.
- The mail invitation will be sent automatically to the guests on the selected date.