The software has provisions for you to send an email invitation to your guests/ attendees. It can be saved as a draft with a future date when required to be delivered. Now let's create an email invitation.
- First, click on “Guest Communication” on the left of the tool-bar.
- It consists of pages such as “Email Invitation, “Guest Communication”, “Rsvp Confirmation” and “Check-in Messages”.

Understanding the steps involved in creating Email Invitation in Event Dashboard
In the Email Invitation tab, you can send the event invitations to your contacts.
- Click on “Email Invitation” that is the first tab at the top bar of Guest Communication.

- Click on “+Create Invitation” at the top right corner.
- On clicking, you will get a page consisting of two sections, “Invitation” and “Email Setup”.

- Here, fill in the details as per your requirement like “Campaign Name” (which is event name), “Name of Sender” (event organizer), “Subject Line” (Email Subject)

- Here you are provided with some predefined templates that you can use to create your invitation. T
- To add a sample template, click on “Select Template”.
- This will give a pop-up consisting of various samples.
- Select one by clicking on it.

- The selected sample appears on the workspace.

- To add the event registration link in your email invitation, click on the RSVP button and add [RSVP_LINK] under the URL section.
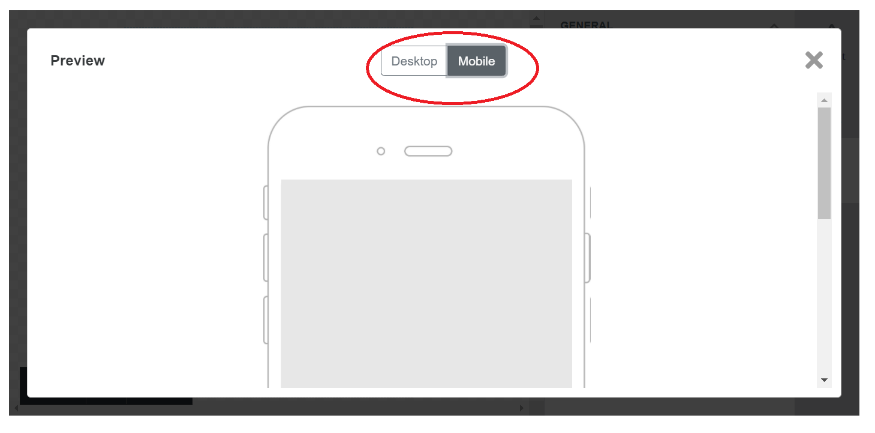
- You can also preview your template by clicking on the “eye” icon at the left bottom of the workspace.

- This will open a new page where you can select “Desktop” or “Mobile” to preview template.
- After you complete the template click on “Save as Template” at the bottom right corner.
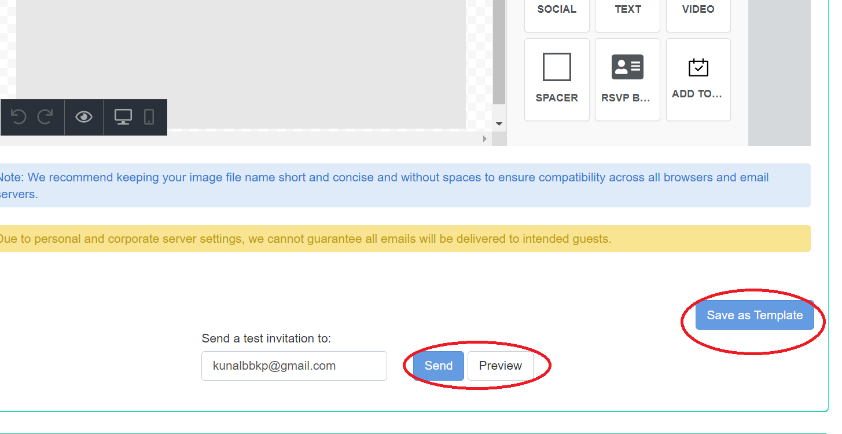
- Before sending the created template as mail to your guests you also have an option to test it by sending a test invitation to your email.
- For this, enter any test mail id at the left of “Send/ Preview” button.
- Click on the “Send” button to send the test invitation e-mail.

- Once done you can add guests mail id under “+Add Contacts” to send the same template to multiple guests simultaneously.
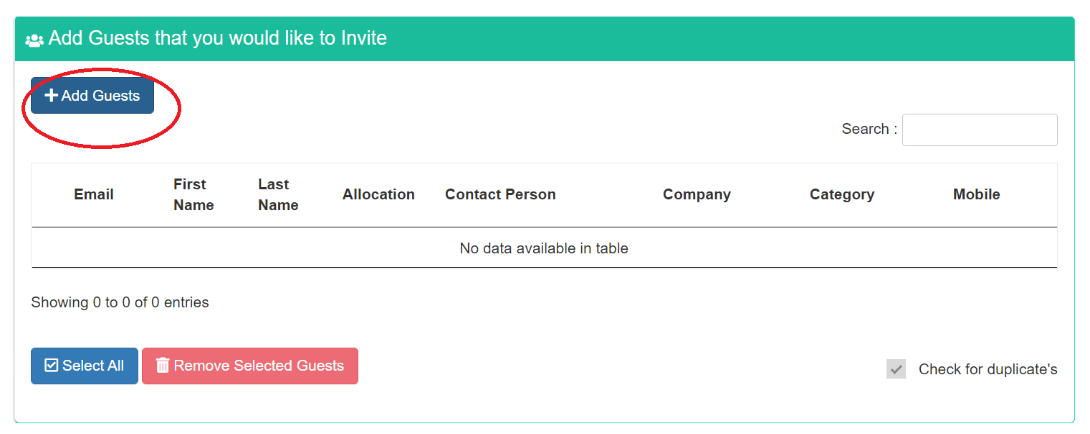
- For this, you have to click on “+Add Guests”
- This will give you an “Add Your Guests” pop-up.
- Here you can enter contacts/ mail id by “Manually enter mail” or import an excel sheet by “Import from CSV”, add contacts from your device by “Select contacts from address book”.

- If you want to send it immediately select “Immediately” at the bottom of the contact list.

- Then click on the “Send Now” button.
- If you want to send it later then click on “Select date” and add the date when you want to send.
- Then click on “Save as draft” button to save all changes in a draft.
- The mail invitation will be sent automatically to the guests on the selected date.