There are two ways to create a session. The first way is adding session while creating the event by clicking on the 'Create Event' button. This will help to create one session for your event.
If you want to add multiple sessions for an event then "Go to Dashboard".
First, let us understand the steps involved in session creation in 'Create Event'.
- Click on "Create Event". Fill in the first two tabs and go to session tab.

- Fill in with a suitable title for your event session besides 'Session Name'.
- Next fill-in 'Session Description'. Here you can provide any details or a piece of information about your event.
- Then select Session start time, end time and ticket booking start, end time by clicking on the calendar icon beside them.

- Select session status by clicking on the drop-down beside “Status”. They are as follows:
Enabled: Event session created can be viewed by all viewers with the availability of ticket bookings.
Disabled: Event session created can only be viewed. No bookings of the event can be done
Hidden: Event session cannot be viewed at all. The app does not display the session even if created.
Now let us understand how to create multiple sessions using 'Sessions Tab'
In the Event dashboard go to the 'Sessions' tab on the left tool-bar.

Click on "+Add-Object" at the right corner.
- Click on "+Session" on the pop-up.

- To add a session, click on “+Session” present on Add object pop up.
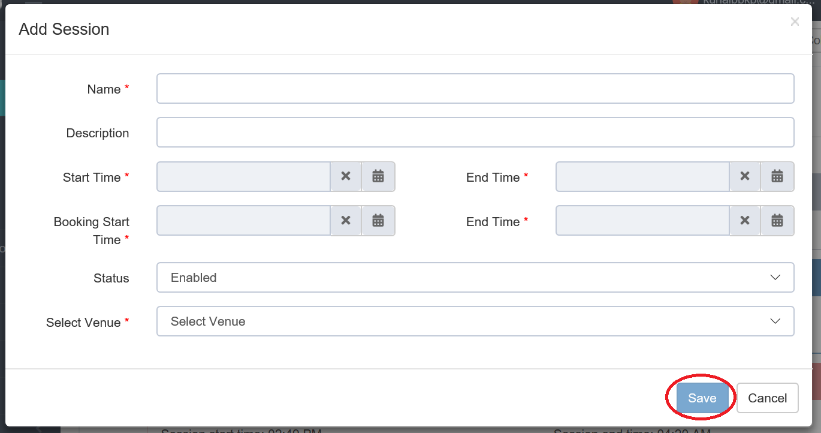
- On clicking, you will get the “Add Session” pop-up.

- Fill in the details under 'Name' and 'Description' tab.
- Select the session 'Start Time', 'End Time', 'Booking Start Time', 'Booking End Time', 'Status' and 'Select Venue'.
Note: The details with “*” are mandatory.
- At 'Select Venue' add the particular group for which it is created.
- This helps you to add that session under the selected group. (Note this especially, when you have created multiple groups for an event).

- After filling in all the details, click on the “Save” button at the right bottom of the pop-up.
- This will again give you a pop-up.

- Click on “Yes, Save Layout!” if you have completed creating a session.
- Once saved you can see the newly created session under the particular group.

- If you have anything to edit in session, click on “No, Continue edit!”
- This will take you to your created session where you can click on the “Edit” button in the right corner.

- You will get an “Edit Session” pop-up.
- After you have made changes, click on the “Update” button at the right bottom.

- In many cases editing a session is required when you want to disable a session or hide a session for an event.
Know more about Session “Status” with an example:
For example, if bookings for a particular show of an event/movie is full and you want to disable it to stop further bookings. In this, you just need to change session status to “Disabled”. The users at such time can just view the particular show on the app. He can’t proceed further.
Another example, if the show has ended and you need to remove its details from the app. You just need to select “Hidden” at session status. Viewers can’t see this show at all on the app.
- Similarly, you can add and edit as many sessions as you want under one or multiple groups for an event.